How to Flush an A/C System with R141b in the UAE (Step-by-Step)
How to Flush an A/C System with R141b in the UAE (Step-by-Step)
Flushing an automotive A/C system removes debris, degraded oil, and contaminants—crucial after compressor failure or major component replacement. This guide explains when to flush, how to do it correctly with R141b solvent, and the best practices UAE workshops follow to protect performance and reliability.
Need bulk supply? Order R141b solvent in the UAE or talk to our team via the contact page.
When Should You Flush?
- Compressor failure (metallic debris or “black death”).
- System contamination (moisture, sludge, unknown oil).
- Major component replacements (condenser, lines, expansion device).
- After improper service/mixing to restore baseline cleanliness.
Tools & Materials
- R141b flushing solvent (order here).
- Approved flush gun or machine, inline filter.
- Recovery unit and manifold set (for the specified refrigerant).
- Nitrogen or dry air for purging (if required by your procedure).
- Vacuum pump (deep vacuum capability).
- New receiver-drier/accumulator and orifice tube/expansion valve as needed.
- Correct compressor oil per OEM spec.
- PPE: gloves, eyewear, ventilation as appropriate.
Step-by-Step Flush Procedure
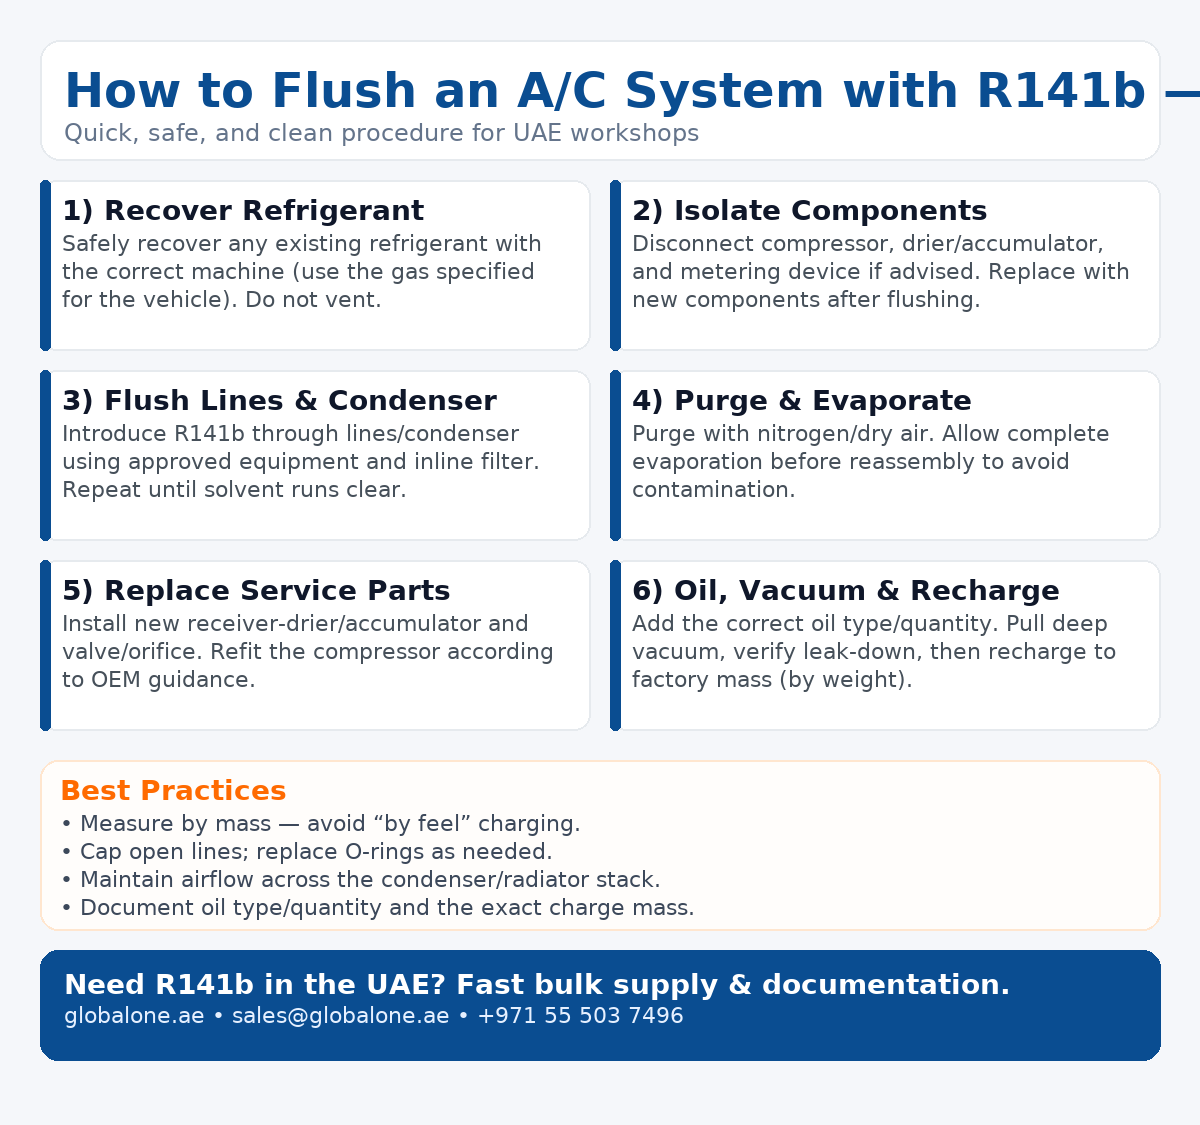
1) Recover Refrigerant
Safely recover any existing refrigerant using the correct machine for the vehicle’s specified gas (R134a or applicable type). Do not vent.
2) Isolate Components
Disconnect components that should not be flushed (e.g., compressor, receiver-drier/accumulator, thermal expansion valve/orifice if advised). Replace these parts with new ones after the flush.
3) Flush Lines & Condenser with R141b
Introduce R141b through the lines and condenser following your equipment’s instructions. Use an inline filter to trap debris. Repeat until the solvent exiting the system runs clear.
4) Purge & Evaporate Solvent
Use nitrogen or dry air to purge. Allow sufficient time for evaporation per product guidance. Ensure no liquid solvent remains before reassembly.
5) Replace Service Parts
Install new receiver-drier/accumulator and metering device (orifice/valve) if required. Refit the compressor (new or remanufactured) per OEM instructions.
6) Oil, Vacuum, and Recharge
Add the correct oil type and quantity. Pull a deep vacuum to remove moisture and confirm tightness (leak-down test). Recharge with the specified refrigerant to the factory fill mass—see Honeywell R134a or Freon R134a (Chemours) for genuine supply.
Best Practices (UAE Workshops)
- Measure, don’t guess: Charge by mass, not just pressure.
- Keep it clean: Cap open lines. Replace O-rings as needed.
- Airflow matters: Ensure condenser/radiator stack is unobstructed.
- Document: Record oil type/quantity, refrigerant mass, and parts replaced.
Common Mistakes to Avoid
- Flushing through the compressor (generally not recommended).
- Re-using a contaminated drier/accumulator.
- Incomplete solvent evaporation before reassembly.
- Charging by “feel” instead of factory specifications.
Ordering R141b in the UAE
Global One supplies R141b solvent and refrigerant gases with fast UAE delivery and documentation support.
- R141b Solvent — UAE
- Honeywell R134a — UAE
- Freon R134a (Chemours) — UAE
- Get a Quote • Email: [email protected] • Tel: +971 55 503 7496
FAQs
Can I flush the compressor with R141b?
Generally no—follow manufacturer guidance. Flush lines and condenser; replace or service the compressor separately.
How much R141b solvent do I need?
It depends on system size and contamination. Start with a moderate quantity and flush until the exiting solvent is clean.
How long does drying take?
Allow full evaporation after purging, then pull a deep vacuum. Time varies with ambient conditions and procedure.
Do you provide SDS and documentation?
Yes—on request. See our R141b page or contact us.